
ENROLLMENT IS OPEN
Online Workshops

Setting a Foundation for Success - $79
Setting a Foundation for Success workshop series…a series designed to kickstart your pottery journey with confidence! Whether you’re a total beginner or looking to brush up on the basics, I’ll guide you every step of the way - in a low pressure, fun, welcoming vibe.
First up, you’ll dive into The Clay Chronicles: My Journey in Clay, Influences and Ideas, and Curious Tools.
· My Journey in Clay... the Story (72 min.)
· Influences and Ideas (6:00 min.)
· Curious Tools (42 min.)
· BONUS: How-to Tool Videos
Next is Preparing Clay, where I’ll walk you through the essential steps to get your clay ready for the wheel - the perfect start for setting you up for success.
· Preparing Your Clay (17 min. )
· BONUS: More Helpful Clay Prep Ideas
Using well prepared clay can contribute greatly to your success at the wheel. Wedging versus kneading? They're different. Air pockets? They're not helpful.
In Throwing Basics, a 4-part lesson I'll demonstrate and describe in detail how to make 2 types of pots: the simple bowl and a cylinder-shaped cup. And each demo begins with centering options for you to try.
Plus: hand and finger positions, water and tool use, moving pots from the wheel head, finishing and trimming steps, and lots of handle-making options… and much more. So, let's get started…
· Part One - The Bowl (29 min. )
· Part Two – Throwing Cylinders: The Cup (13 min. )
· Part Three – Finishing (25 min. )
· Part Four – Handles (22 min. )
· BONUS: Photo Gallery

Throwing Taller - $119
Throwing tall pots doesn't have to be a challenge!
In this 4-part lesson I'll show you, step by step with a few simple diagrams and concise demos how to move clay upward. And then, how to combine your taller pots in sections to make very tall pots… pots that you'll have under control from start to finish.
I'll share with you:
- a way of thinking about the steps needed to move clay upward
- designs and structure plans for large pot making
- the best hand, knuckle, and fingertip hand positions to use
- the assembling techniques to use when combining your thrown forms
· The Techniques (19 min.)
· Two Piece Pots (31 min.)
· Three Piece Pots (36 min.)
· Two Ways to Make Large Jug Forms (54 min.)
· BONUS: Photo Gallery

Plates and Platters - $69
The plate, like the bowl and cup, is one of the most common shapes we make in clay. But the making of them can at first seem challenging.
In this 3-part lesson, I'll first break down the steps for throwing, trimming and drying a place-setting of three flat-shaped plates with flat wide rims: a bread-and-butter plate, a salad or lunch plate, and a dinner plate. I'll then show you how to throw a curved-shaped plate and two simple ways to make squared plates. And lastly, throwing, trimming, and decorating larger plates and platters.
Shown and described in detail in this lesson:
- tips about clay qualities
- developing a rhythm of making to create plates that look alike
- centering large pieces of clay
- tool use and batt options
- trimming feet for waxing
- thick slip decorating
- avoiding lopsided pots… and more!
· Plates and Platters - Part One (31 min.)
· Plates and Platters - Part Two (22 min.)
· Plates and Platters - Part Three (38 min.)
· BONUS: Pedestal Cake Plate (16 min.)
· BONUS: Photo Gallery
Bonus Lessons
· Elevated Serving Plate (10 min.)
· Pie Plates (118 min.)
· Ring Tray (16 min.)
· Small Serving Bowls (9 min.)

Bottle and Vase Forms - $69
Once you're familiar with the thrown cylinder form it's easy to move into the realm of making vases and bottles in assorted shapes and sizes: large and small, round and square.
In this 5-part lesson I'll demo in detail many of those shape possibilities starting with an effort saving collaring-in hand position technique… one you'll be glad to have in your ‘toolbox’. As I'm working, I'll talk about and demo how I think about the structure of my vase and bottle forms: where I leave the walls thick or thin and why.
I'll also show you an assortment of how-to techniques for wet pot texturing: faceting, paddling and more, using common tools to add some flourish to your forms. Assorted styles and tool-use for trimming feet including the making and use of trimming chucks complete this technique filled lesson.
· Bottle and Vase Forms - Part One (7 min.)
· Bottle and Vase Forms - Part Two (21 min.)
· Bottle and Vase Forms - Part Three (12 min.)
· Bottle and Vase Forms - Part Four (15 min.)
· Bottle and Vase Forms - Part Five - Finishing (22 min.)
· Bonus Lesson: Rocking Vase (12 min.)
· BONUS: Photo Gallery
Baking and Serving Ware - $69
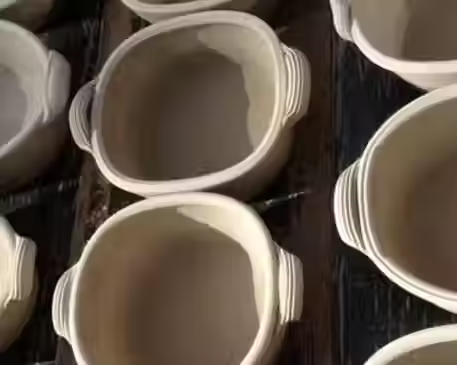
Making oven-proof baking ware with clay goes back thousands of years. And clay pots are still a go-to for many people who cook: quiche pans to lidded bean pots, lidded casseroles and open- topped bakers… the list is long.
In this 5-part lesson I'll share with you the details - the do’s and don'ts when designing, throwing and altering ovenware. From clay types and tool-use to shapes, lids and handles, plus the how-to’s when making lids for oval forms. And I'll show you how to make the ever-popular square lasagna pan. Finishing our pots, lids, and adding handles is a big part of this lesson… the details that will make your work look professional and appealing to use!
· Bakingware - Part One (23 min.)
· Bakingware - Part Two (21 min.)
· Finishing - Part One (19 min.)
· Finishing - Part Two (12 min.)
· Finishing - Part Three (16 min.)
· BONUS: Photo Gallery
Bonus Lessons
· Elevated Serving Plate (10 min.)
· Pie Plates (18 min.)
· Ring Tray (16 min.)
· Small Serving Bowls (10 min.

Repetition Throwing - $69
Once you've mastered the basics of throwing, making sets or multiples of pots that look alike is often the next challenge.In this 4-part lesson I'll show you how to simplify the process: getting prepared for a ‘run’ of pots, the quality and weights of clay, measuring options, and the rhythm of making are the foundations.
You'll see 3 different types of pots made and finished in repetition: the spoon rest as a beginning exercise, the soup/cereal bowl as a slightly more challenging effort, and a cylinder-shaped utensil jar with handles as a skillful accomplishment. Lots of measuring techniques, throwing, and finishing tips here.
Content in order of presentation
1. Keeping records
2. Tool selection
3. Developing a rhythm in making
4. Making spoon rests
5. Using a pot gauge
· Part One – Making Multiples - Spoon Rests (18 min.)
· Part Two - Making Soup/Cereal Bowls (14 min.)
· Part Three – Making Utensil Crocks (15 min.)
· Part Four – Finishing (40 min.)
· BONUS: Photo Gallery
Lids and Lidded Forms - $239
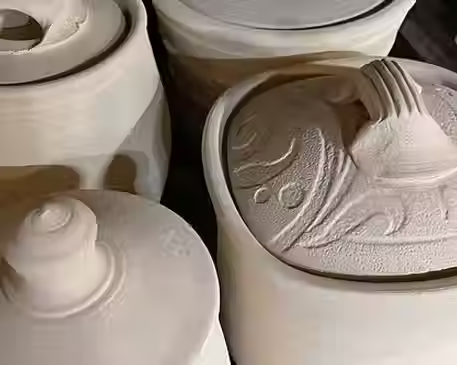
Making well designed pots with good fitting lids is something we all aspire to.
In part # 1, I’ll show you:
- 3 ways to create a gallery at the rim of your pot
- 5 lid types and how to throw and trim each of them
In part # 2, I'll show you 4 more lid types:
- how to throw a tall, domed lid
- how to throw a wide, drop-in lid
- how to create a gallery at the rim of your lid
- how to make an over-the-rim lid
- how to finish these pots and their lids
In part # 3, I’ll show you another 4 lid options:
- how to make a two-piece butter dish… plate and lid
- how to throw an in-line domed lid and pot
- how to make a ginger jar form and its lid
- how to make a one-piece, lidded ‘box’
- how to trim and finish this series
In part # 4, I’ll show you:
- how to make decorated slab lids for oval and square pots
- handle options for slab lids
- trimming oval and square pots
So many tips here!
-
Introduction
-
Lids and Lidded Forms Part One: One - Five (105 min.)
-
Lids and Lidded Forms Part Two: Six - Nine (78 min.)
-
Lids and Lidded Forms Part Three: Ten - Thirteen (73 min.)
-
Slab Lids for Oval and Square Forms (56 min.)
-
BONUS: Corks as a Lid
-
BONUS: Photo Gallery

Making Great Handles - $179
Hi! And welcome to your info-loaded workshop all about how to make great handles.
As I was putting this workshop together, I thought about the many times in the past that I stumbled over making decent handles: What style of handle should I use for this pot and how do I make it? Is this handle too big for this pot… or too small? Should this handle be a fancy one? Or something plain and simple? And how do I make a handle look like it's part of the pot and not a sloppy added-on afterthought?
The answers to these questions and others like them start with some basic handle-making steps followed by a bit of controlled practice. And that's where this workshop begins as I show you the basics - the starting steps that then lead to confident handle-making for your future pots. And yes, making great handles does take a bit of practice. But knowing the steps one has got to practice is often a mystery! To help you understand and master those basic techniques, I’ll demo and describe them in detail for you… which where this workshop begins. Then, once you've mastered making the simple handle I promise you’ll find so many other handle-making doors opening without a struggle: handles for baking dishes and baskets, teapots, pouring pots, lids, ladles and mugs and more.

Making Bowls: Workshop One - $179
From small sauce cups to soup bowls, colanders and big bread bowls… bowls of all shapes and sizes are probably the most used ‘tools’ in any kitchen.
They're usually one of the first shapes we potters learn to make… and one we continue to make often because of the many variations that are possible with this basic form. It's one of what I call the ‘triplets’ of clay: one of the three basic forms, with the cup and plate, from which many other pottery shapes are derived.
Mastering the making of small simple pots and then moving on to larger more complicated forms as our skills and muscle memory develop is part of the natural progression of learning to make good pots. And the bowl, because of its many possible variations, is an ideal form to make as we quickly advance our skills and work on developing our voice in clay. I do look forward to making bowls with you!
A chart of weights and measures for all the bowls in this workshop is provided in a pdf. at the end of each lesson.
In lesson #1 we'll start with simple bowls of less than a pound in weight. We’ll then gradually increase weights and sizes as our hands-on practice and understanding of the form develops. We’ll start simple and small… and gradually move up from there as we make:
- a sauce/dipping bowl with 6-oz.’s of clay
- a 14-oz. custard/prep bowl
- an ice cream bowl with one side handle
- a thin rimmed soup/cereal bowl
- a thick rimmed soup/cereal bowl
Simple Bowls... the Beginning
· Introduction
· Making (51 min.)
· Finishing (22 min.)
· BONUS: Photo Gallery
Spouted Bowls and Pasta Bowls
· Introduction
· Making (48 min.)
· Finishing (39 min.)
· BONUS: Photo Gallery

Making Bowls: Workshop Two - $179
Mastering the making of small simple pots and then moving on to larger more complicated forms as our skills and muscle memory develop is part of the natural progression of learning to make good pots.
In lesson #1 of the 3 in this advanced series of bowl making I’ll start by sharing with you the making steps of five formal bowls. And what is a formal bowl? To me, it’s a bowl that doesn’t get much practical kitchen use and often ends up as part of a dining table center piece. This will become clearer as I describe and demo the making of the first three bowls.
In lesson #2 I'm going to demo the making of five bowls using 2 to 6 lbs. of clay. After throwing each bowl I’ll show you how I use some simple hand-tools - or my fingertips - to alter each one of them in some curious ways. And I'll make those alterations right after throwing each bowl as it sits wet on the wheel head.
Lesson #3 is all about Making MORE Useful Bowls…
Many of the pots we make are what I call single-sellers. What does that mean? Single-sellers are the functional pots that nobody ever buys in a set.
Formal Bowls
· Introduction
· Making (42 min.)
· Finishing (32 min.)
· Bonus Lesson (7 min.)
· BONUS: Photo Gallery
Bowls with Altered Rims
· Introduction
· Making (39 min.)
· Finishing (20 min.)
More Useful Bowls
· Introduction
· Making (46 min.)
· Finishing (58 min.)
· BONUS: Photo Gallery
Bonuses
· Introduction
· Large Bowl with Decorated Rim (14 min.)
· Nesting Bowls (20 min.)
· Intersecting Bowls (31 min.)

Making Drinking Vessels: Workshop One - $159
The drinking vessel is one of the triplets of useful pottery forms - the cup, plate, and bowl - from which almost every other functional clay form is derived. And there's nothing better than using a well-designed cup that does its job perfectly!
In lesson #1, I'll share with you the throwing, decorating, finishing, and some simple altering ideas – plus a handle-making and attachment demo – on five simple drinking forms.
In lesson #2, we’ll make mugs… and more mugs!
I'll demo the making of five mugs in a progression of sizes in more than a dozen shapes.
Along the way, I'll show you more than a dozen altering and decorating techniques: faceting, squaring, stamping, sprigging, loose throwing, and patterned scratching, and more. And I'll describe my thought process as I demo the basics of handle-making in detail. Plus, a little add-on… making lids for coffee and tea mugs!
Tips and Techniques in abundance to help you make your best mugs!
Simple Cups
-
Making (44 min.)
-
Finishing (30 min.)
-
Weights and Measures Chart
-
BONUS: Photo Gallery
Mugs
-
Making (66 min.)
-
Finishing (64 min)
-
Weights and Measures Chart
-
BONUS: Photo Gallery

Making Drinking Vessels: Workshop Two - $159
There are many ancient forms of drinking vessels – vessels that have certainly influenced contemporary cup designs and the forms we potters make. Surprisingly, the handled mug we all use today wasn't often found among ancient vessel forms. But two-handled drinking vessels? Yes… the large Roman and Greek double-handled chalice forms are the forebearers of one of the forms we’ll make in this workshop: the goblet, or as the ancient forms are called; the chalice.
Equally historic drinking forms like the handless cup or yunomi, and the curious drinking horn are also forms we’ll make…along with the contemporary tea or coffee cup and saucer.
In lesson #1 I’ll share with you the making of four styles of goblets. I'll make two different goblets in each style showing different forms and proportions, surface treatments and decoration.
In lesson #2 we'll make four different tea or coffee drinking vessels plus that curious-looking horn’-shaped cup.
The making of a good drinking vessel, whether a cup for tea or coffee, wine, sangria or beer is an essential skill we all should have in our ‘making toolbox’. And in this workshop, I’m here to help you gain those skills. So, drink up and I’ll see you there!
Goblets
-
Making (37 min.)
-
Finishing (39 min.)
-
BONUS LESSON (18 min.)
-
Weights and Measures Chart
-
BONUS: Photo Gallery
Yunomi's and Tea Cups
-
Making (52 min.)
-
Finishing (46 min.)
-
Weights and Measures Chart
-
BONUS: Photo Gallery

Making Pouring Vessels: Workshop One - $179
Like the bowl plate and cup clay vessels for pouring liquids have been around since the beginning of time. The techniques of making spouts and pouring features for our pots are things that every potter should have in their working hands-on toolbox.
During this extensively detailed two part pouring vessels workshop I share with you dozens of spouted and rim manipulated pouring configurations for all sorts of useful pots… from small to large pitcher forms, to teapots, lidded coffee pots, watering cans, and many more. Sharing clearly and in detail the ‘how-to’s for making well balanced and functional pouring vessels is my method of sharing throughout the workshop.
So, watch, take notes as needed and most importantly, practice what you’re seeing!
Pulling Spouts from The Rim
-
Introduction
-
Pulled Spouts on Simple Forms (21:25)
-
Pulled Spouts on Pitcher Forms - Part One (22:00)
-
Pulled Spouts on Pitcher Forms - Part Two (19:36)
-
Pulled Spouts on Pitcher Forms - Part Three (16:37)
-
Pulled Spouts on Coffee Pots (24:47)
-
Finishing - Part One - Trimming the Bottoms (22:58)
-
Finishing - Part Two - Adding the Handles (34:40)
-
Finishing - Part Three - Finishing the Coffee Pots (27:16)
-
BONUS - Photo Gallery
Pouring Vessels with Added Spouts
-
Introduction
-
Making the Forms (23:55)
-
Making the Spouts (25:49)
-
Adding the Spouts - Part One (34:52)
-
Adding the Spouts - Part Two (32:57)
-
BONUS: Photo Gallery

Making Pouring Vessels: Workshop Two - $179
Like the bowl plate and cup clay vessels for pouring liquids have been around since the beginning of time. The techniques of making spouts and pouring features for our pots are things that every potter should have in their working hands-on toolbox.
During this extensively detailed two part pouring vessels workshop I share with you dozens of spouted and rim manipulated pouring configurations for all sorts of useful pots… from small to large pitcher forms, to teapots, lidded coffee pots, watering cans, and many more. Sharing clearly and in detail the ‘how-to’s for making well balanced and functional pouring vessels is my method of sharing throughout the workshop.
So, watch, take notes as needed and most importantly, practice what you’re seeing!
Teapot Type Spouts
· Introduction
· Making the Forms (25:50)
· Finishing - Part One (21:55)
· Finishing - Part Two (33:47)
· BONUS: Photo Gallery
Watering Cans
· Introduction
· Making the Parts (22:54)
· Making the Spouts (19:30)
· Assembling Part One (29:48)
· Assembling Part Two (37:44)
· Adding Handles (32:43)
· BONUS: Photo Gallery

Clay Chronicles: My Journey, Influences, and Curious Tools
FREE
Join this free online workshop to explore the world of clay with a seasoned potter. The workshop consists of three image-filled lessons:
-
Journey in Clay: Follow the potter's story from a high school student to a globetrotter learning from master potters. Gain insight into the potter's background and passion for the craft.
-
Influences and Ideas: Discover the eclectic inspirations that drive the potter's creativity and find out how these moments can inspire your own work.
-
Curious Tools: Learn about the essential and unique pottery tools that help shape the potter's creations. Whether you're a beginner or an experienced potter, these tools will enhance your art.
Don't miss this opportunity to join a personal and inspiring journey into the art of clay with over 50 years of expertise shared in this workshop.

BUNDLE
MAKING BOWLS
WORKSHOP ONE AND TWO - $340
SAVE 5%
From small sauce cups to soup bowls, colanders and big bread bowls… bowls of all shapes and sizes are probably the most used ‘tools’ in any kitchen.
They're usually one of the first shapes we potters learn to make… and one we continue to make often because of the many variations that are possible with this basic form. It's one of what I call the ‘triplets’ of clay: one of the three basic forms, with the cup and plate, from which many other pottery shapes are derived.
Mastering the making of small simple pots and then moving on to larger more complicated forms as our skills and muscle memory develop is part of the natural progression of learning to make good pots. And the bowl, because of its many possible variations, is an ideal form to make as we quickly advance our skills and work on developing our voice in clay. I do look forward to making bowls with you!
A chart of weights and measures for all the bowls in this workshop is provided in a pdf. at the end of each lesson.
In lesson #1 we'll start with simple bowls of less than a pound in weight. We’ll then gradually increase weights and sizes as our hands-on practice and understanding of the form develops. We’ll start simple and small… and gradually move up from there as we make:
- a sauce/dipping bowl with 6-oz.’s of clay
- a 14-oz. custard/prep bowl
- an ice cream bowl with one side handle
- a thin rimmed soup/cereal bowl
- a thick rimmed soup/cereal bowl
WORKSHOP ONE:
Simple Bowls... the Beginning
· Introduction
· Making (51 min.)
· Finishing (22 min.)
· BONUS: Photo Gallery
Spouted Bowls and Pasta Bowls
· Introduction
· Making (48 min.)
· Finishing (39 min.)
· BONUS: Photo Gallery
WORKSHOP TWO:
In lesson #1 of the 3 in this advanced series of bowl making I’ll start by sharing with you the making steps of five formal bowls. And what is a formal bowl? To me, it’s a bowl that doesn’t get much practical kitchen use and often ends up as part of a dining table center piece. This will become clearer as I describe and demo the making of the first three bowls.
In lesson #2 I'm going to demo the making of five bowls using 2 to 6 lbs. of clay. After throwing each bowl I’ll show you how I use some simple hand-tools - or my fingertips - to alter each one of them in some curious ways. And I'll make those alterations right after throwing each bowl as it sits wet on the wheel head.
Lesson #3 is all about Making MORE Useful Bowls…
Many of the pots we make are what I call single-sellers. What does that mean? Single-sellers are the functional pots that nobody ever buys in a set.
Formal Bowls
· Introduction
· Making (42 min.)
· Finishing (32 min.)
· Bonus Lesson (7 min.)
· BONUS: Photo Gallery
Bowls with Altered Rims
· Introduction
· Making (39 min.)
· Finishing (20 min.)
More Useful Bowls
· Introduction
· Making (46 min.)
· Finishing (58 min.)
· BONUS: Photo Gallery
Bonuses
· Introduction
· Large Bowl with Decorated Rim (14 min.)
· Nesting Bowls (20 min.)
· Intersecting Bowls (31 min.)

BUNDLE
MAKING DRINKING VESSELS
WORKSHOP ONE AND TWO - $302
SAVE 5%
WORKSHOP ONE:
The drinking vessel is one of the triplets of useful pottery forms - the cup, plate, and bowl - from which almost every other functional clay form is derived. And there's nothing better than using a well-designed cup that does its job perfectly!
In lesson #1, I'll share with you the throwing, decorating, finishing, and some simple altering ideas – plus a handle-making and attachment demo – on five simple drinking forms.
In lesson #2, we’ll make mugs… and more mugs!
I'll demo the making of five mugs in a progression of sizes in more than a dozen shapes.
Along the way, I'll show you more than a dozen altering and decorating techniques: faceting, squaring, stamping, sprigging, loose throwing, and patterned scratching, and more. And I'll describe my thought process as I demo the basics of handle-making in detail. Plus, a little add-on… making lids for coffee and tea mugs!
Tips and Techniques in abundance to help you make your best mugs!
Simple Cups
-
Making (44 min.)
-
Finishing (30 min.)
-
Weights and Measures Chart
-
BONUS: Photo Gallery
Mugs
-
Making (66 min.)
-
Finishing (64 min)
-
Weights and Measures Chart
-
BONUS: Photo Gallery
WORKSHOP TWO:
There are many ancient forms of drinking vessels – vessels that have certainly influenced contemporary cup designs and the forms we potters make. Surprisingly, the handled mug we all use today wasn't often found among ancient vessel forms. But two-handled drinking vessels? Yes… the large Roman and Greek double-handled chalice forms are the forebearers of one of the forms we’ll make in this workshop: the goblet, or as the ancient forms are called; the chalice.
Equally historic drinking forms like the handless cup or yunomi, and the curious drinking horn are also forms we’ll make…along with the contemporary tea or coffee cup and saucer.
In lesson #1 I’ll share with you the making of four styles of goblets. I'll make two different goblets in each style showing different forms and proportions, surface treatments and decoration.
In lesson #2 we'll make four different tea or coffee drinking vessels plus that curious-looking horn’-shaped cup.
The making of a good drinking vessel, whether a cup for tea or coffee, wine, sangria or beer is an essential skill we all should have in our ‘making toolbox’. And in this workshop, I’m here to help you gain those skills. So, drink up and I’ll see you there!
Goblets
-
Making (37 min.)
-
Finishing (39 min.)
-
BONUS LESSON (18 min.)
-
Weights and Measures Chart
-
BONUS: Photo Gallery
Yunomi's and Tea Cups
-
Making (52 min.)
-
Finishing (46 min.)
-
Weights and Measures Chart
-
BONUS: Photo Gallery

BUNDLE
MAKING POURING VESSELS
WORKSHOP ONE OR TWO - $340
SAVE 5%
Like the bowl plate and cup clay vessels for pouring liquids have been around since the beginning of time. The techniques of making spouts and pouring features for our pots are things that every potter should have in their working hands-on toolbox.
During this extensively detailed two part pouring vessels workshop I share with you dozens of spouted and rim manipulated pouring configurations for all sorts of useful pots… from small to large pitcher forms, to teapots, lidded coffee pots, watering cans, and many more. Sharing clearly and in detail the ‘how-to’s for making well balanced and functional pouring vessels is my method of sharing throughout the workshop.
So, watch, take notes as needed and most importantly, practice what you’re seeing!
Teapot Type Spouts
· Introduction
· Making the Forms (25:50)
· Finishing - Part One (21:55)
· Finishing - Part Two (33:47)
· BONUS: Photo Gallery
Watering Cans
· Introduction
· Making the Parts (22:54)
· Making the Spouts (19:30)
· Assembling Part One (29:48)
· Assembling Part Two (37:44)
· Adding Handles (32:43)
· BONUS: Photo Gallery
Pulling Spouts from The Rim
-
Introduction
-
Pulled Spouts on Simple Forms (21:25)
-
Pulled Spouts on Pitcher Forms - Part One (22:00)
-
Pulled Spouts on Pitcher Forms - Part Two (19:36)
-
Pulled Spouts on Pitcher Forms - Part Three (16:37)
-
Pulled Spouts on Coffee Pots (24:47)
-
Finishing - Part One - Trimming the Bottoms (22:58)
-
Finishing - Part Two - Adding the Handles (34:40)
-
Finishing - Part Three - Finishing the Coffee Pots (27:16)
-
BONUS - Photo Gallery

Please get in touch if you have any questions. We're here to help you!